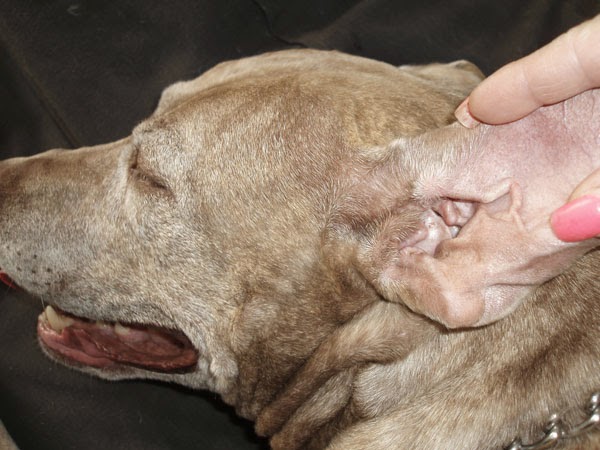
It is important to take time each week to examine your dog’s ears for signs of irritation, infection, dirt and parasites. These at-home ear exams don’t take long, and can help you identify minor issues before they become larger, more painful problems. Simply look inside each ear for signs or redness, discharge, dirt, or waxy buildup.Your dog’s ears are the perfect environment to grow bacteria and yeast, which can lead to serious infections. Routine cleaning and at home examination lets you detect any infections or other problems early. If you suspect your pet already has an ear problem, visit your veterinarian immediately.

If your dog’s ears are healthy, meaning there is no infection, they will appear to be the same pale color as the rest of your dog’s skin. Infected ears will appear red and they may be filled with discharge. They also may have a foul odor that you will definitely notice. Plus, your dog’s infected ears will be sensitive to touch and could cause the dog considerable pain. He will probably react to any contact by whining or cringing.
Prompt treatment offers a better prognosis, reduces the potential for chronic disease, hearing loss, and gives earlier relief for any discomfort your pet may have. Any discharge, odor, excess scratching, pawing or rubbing at the ears, redness, pain, swelling or masses may indicate an infection or other abnormality.
Another affliction your dog may have is ear mites. Ear mites themselves are difficult to see with the naked eye, but this may be the case if your pet is frequently scratching at his ears or shaking his head. If the mites have been there for a while, you may also notice dried blood inside his ears. A veterinarian will need to diagnose this condition and can provide you with special ear drops that contain insecticide.
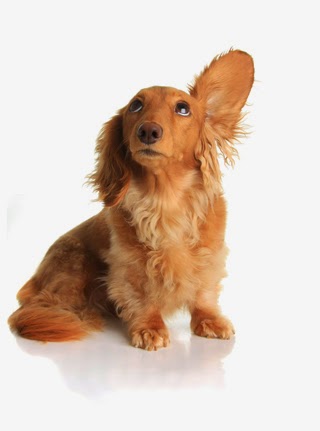
Dogs with allergies are particularly vulnerable, as are those with floppy ears, like Cocker spaniels, Basset hounds and Poodles.
Getting Started With Ear Cleaning
It is best to clean a dog’s ears in the bathroom, a mud room, or another room of your home where you won’t mind a potential mess. Most dogs don’t enjoy having their ears cleaned, which means spills are inevitable.
Before cleaning the ears, inspect them. You can get an idea of how dirty they are and you can check for excess hair. If your dog has a lot of hair coming from the ear canal, that hair may need to be plucked. You can do this with your fingers, tweezers, or hemostats. A special ear powder made for dogs may be helpful in gripping the hair. Talk to your groomer or vet’s office about this process.
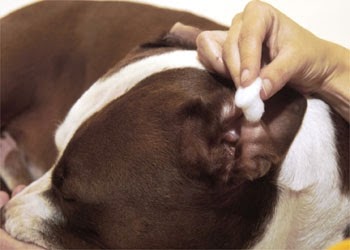
The best tools to use for cleaning your dog’s ears are a good pair of hemostats and some cotton balls. Do not use Q-tips on a dog’s ears, as they can push debris further inside the ear canal, or even damage the ear. Hemostats can be purchased at drug stores, pharmacies, or from your veterinarian. You can purchase an ear cleaning solution specifically created for pets, or you can mix one up at home. Purchase an ear-cleaning solution from your vet or a pet supply store. This is either a blue or clear liquid and is usually sold in a plastic bottle with a dropper tip. Ask an employee if you need help finding it.
A highly recommended home ear cleaning solution is 1 part white vinegar to 1 part of water. This solution works wonders on dogs that have chronic yeast or bacterial infections in their ears. Another ear cleaning solution you can mix at home is 1 part hydrogen peroxide to 1 part water. Never use alcohol to clean your dog’s ears. Alcohol can dry out the sensitive skin inside the ears and cause allergic reactions.
Steps
Begin by holding the ear flap up and squirting a few drops of cleanser on the inside of the flap near the ear opening. If using homemade solution, get a squeeze bottle or bulb syringe with a tip that is about an inch long . Next, gently place the tip of the bottle into the ear and give a gentle squeeze. Do not use an excessive amount of pressure when squeezing the cleanser into the ear.
Before he can shake his head, begin massaging the base of your dog’s ear . You should be able to hear a “smacking sound.” By massaging, you are helping the cleanser to fill the ridges in the canal and loosen ear debris. After massaging for a few seconds , you can let go and allow your dog to shake. You might want to turn away or hold up a towel for this part.
Once your dog has a good shake, use the cotton or gauze and your finger to wipe out the ear canal. You can put your finger in the ear canal as far as it will go without forcing it. You may wish to use cotton-tipped applicators to clean stubborn debris out of the ridges. NEVER put the cotton-tipped applicators into the ear any further than you can see! Damage to the eardrum can occur.
If the ear still seems dirty, you may repeat the process. Then, move on to the other ear. Finish by wiping away any visible debris and drying your dog’s head off. Then, reward him with a treat!
Tips
- Rewarding the dog after a cleaning helps them relax and realize that if they cooperate the next time, they’ll get a treat.
- Never insert a cotton swab deep into the dog’s ear canal! This can cause permanent hearing damage.
- The vinegar helps dissolve wax. If your dog’s ears are fairly clean to begin with, you can just use water to wipe them out.
- Your veterinarian can show you how to properly clean your pet’s ears; just ask.
- Be gentle! Remember it’s just a little dog.
Warnings
If your dog has had ear infections before, ask your vet what to use to clean his ears and how often to do so. Too much cleaning can actually cause ear infections.
Do NOT poke into the dog’s ear canal. Your dog and his hearing will not be happy with you.
If your dog’s ear(s) are very dirty, gooey, or have discharge (pus: yellow, red, green, or brown), DO NOT clean his ears.
SEE YOUR VET – your pet probably has an ear infection.